


Coverage Test (Including LFT): Why Proper Adhesive Coverage Is Important for Tile Installation
")
12
Apr 2026
Tiles make a space look clean, modern, and attractive. We use tiles in homes, offices, malls, bathrooms, kitchens, and outdoor areas. But many people only focus on the design and finish of the tile. They forget one important thing — the adhesive under the tile.
No matter how expensive or beautiful the tile is, it will not last long if the adhesive is not applied properly. Tiles may start making hollow sounds. Corners can crack. Water may go under the tile. In some cases, tiles can even come off. This is why doing a Coverage Test, including for Large Format Tiles (LFTs), is very important.
Let’s understand this in very simple words.
What Is a Coverage Test?
A Coverage Test is a simple check done during tile installation. It helps to see how much adhesive is touching the back of the tile. In easy words, it checks if the tile is properly stuck to the surface.
Coverage is measured in percentage:
- Around 80–85% coverage is usually fine for dry indoor areas like bedrooms or living rooms.
- 95–100% coverage is needed for wet areas like bathrooms, kitchens, balconies, and for Large Format Tiles.
If the adhesive does not cover enough area, empty spaces remain under the tile. These empty spaces make the tile weak. Over time, this can cause damage.
So even if the tile looks perfect from the top, the problem can be hidden underneath.
Why Coverage Is More Important for Large Format Tiles (LFTs)

Large Format Tiles are very popular today. They look stylish and give a smooth, seamless finish. Because they are big in size, there are fewer joints, which makes the area look more premium.
But large tiles are heavier and bigger. This creates some challenges:
- They need strong support underneath.
- If adhesive is uneven, hollow spots can form.
- They need a flat surface; otherwise, edges may not align properly.
- Bigger tiles are more affected by temperature changes.
Because of these reasons, Large Format Tiles need almost full adhesive coverage. Installers often use a method called back buttering or double spreading. This means putting adhesive on the floor or wall and also on the back of the tile. This helps in getting better contact and stronger bonding.
How to Perform a Coverage Test
The process is not difficult, but it must be done carefully.
- Apply the Adhesive Properly
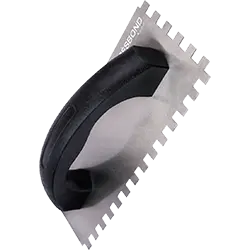
Spread the adhesive using the correct notched trowel. For larger tiles, use a bigger notch so enough adhesive is applied. - Place the Tile Firmly
Put the tile on the adhesive and press it gently. Move it slightly in a twisting motion. This helps the adhesive spread evenly. - Lift the Tile and Check
Carefully lift the tile and look at the back. You should see adhesive spread across most of the surface. - Make Changes If Needed
If you see too many empty areas, you may need to:
- Use a bigger trowel,
- Apply more adhesive,
- Improve the spreading method.
Doing this test regularly during installation helps avoid future problems.
Benefits of Proper Adhesive Coverage

When coverage is correct, you get many advantages:
- Stronger Bond – Tiles stay fixed for a long time.
- No Hollow Sound – Proper support reduces empty gaps.
- Better Life of Tiles – Less chance of cracks or loosening.
- Water Protection – Very important in bathrooms and kitchens.
- Even Weight Support – Heavy tiles get full backing.
- Lower Repair Cost – Fewer problems in the future.
Using good adhesive also makes a difference. For example, Gresbond by Kajaria offers tile adhesives that are made for strong bonding and smooth spreading. But even the best adhesive needs proper application and testing.
Best Ways to Get Full Tile Coverage
To make sure coverage is good, follow these simple tips:
- Use Double Spreading for Large Tiles
Apply adhesive on both the surface and the back of the tile. - Choose the Right Trowel Size
Small trowels may not spread enough adhesive. Always match the trowel size with tile size. - Mix Adhesive Properly
Do not make it too thick or too watery. Follow the instructions given by the manufacturer. - Press Tiles Properly
After placing the tile, press and slightly move it to remove air gaps. - Do Regular Checking
Do not assume everything is fine. Lift a few tiles and check coverage during installation.
Common Mistakes During Tile Installation to Avoid

Some common errors during tile installation include:
- Not applying adhesive on the back of large tiles.
- Using a small trowel for big tiles.
- Not mixing adhesive correctly.
- Ignoring hollow sounds.
- Working too fast without checking coverage.
Avoiding these mistakes can improve the quality of the installation.
Why Quality Tile Matters
Good adhesive helps achieve better bonding and easier spreading. Gresbond by Kajaria provides polymer adhesives that work well for ceramic tiles, vitrified tiles, and Large Format Tiles. They are designed to give strong grip and long-lasting results.
But remember, product quality and proper technique must go together. Only then will the tile installation remain strong and safe.
Conclusion
The Coverage Test, including for LFTs, may look like a small step, but it is very important. It ensures that tiles are properly fixed and supported. Especially for Large Format Tiles, full coverage is necessary to avoid future problems like cracks, hollow sounds, or tile loosening.
In tile work, what is below the surface is just as important as what you see on top. By doing proper coverage testing and using reliable adhesive like Gresbond by Kajaria, you can make sure the installation stays strong for many years.
Taking a little extra time to check coverage today can save you from expensive repairs tomorrow. And that is always a smart decision.